Photoshop tutorial 005.
PHOTOSHOP TUTORIAL 005
Create a Zombie.
Create a Zombie.
I have a
quite big list of requests now, so let's start with those, and let's make a
Zombie, but not a pretty girly-like zombie - we will make a horrific, gore and
bloody meat eater. I chose an image of Angelina Jolie, but you can pick
whomever you want. To create such an image, I used quite a lot of stock:
overlays and wounds. You can always create your own wounds, but the easiest way
is to use stock images. I will share the ones I used, no worries. I also used
brushes for blood, however I do not recall the exact place where I got them
from, but I will try to find them and post a link to them.

Let's
start, shall we? Open your image in PhotoShop and create a double layer of the
original. At first, we will need to make the skin look somewhat greenish slash
desaturated, because the model should look dead, so using the second layer we just
created, open Color Balance: Image -> Adjustments
-> Color Balance, and play around in there, to make look the skin somewhat
green (not too green, we are not creating an alien). After which, go into Hue/Saturation
(it's just above Color Balance) and move the Saturation line slightly to the left,
just enough for the skin to look pale and give away the sensation of the person
to be dead, because the skin turns grey after death, but the one of Zombies has
that greenish contrast, that we desire to reproduce. Once you have what you
wanted, select the Eraser Tool and erase everything but the skin (in the end,
only the skin must remain). Since we have our original layer beneath, it's like
we only changed the colour of the skin (be sure to erase the hair also). That's
what I got after that step:

Now, let's
take care of the eyes. As you know, Zombies have empty soulless look to them,
so that's what we will do to our image. Cut out the eyes of the layer using Lasso Tool (select them and then do CTRL
+ J), and then using Curves and Selective Color, make the eyes look
whitish, after which, remove the light reflections in them with Clone Stamp Tool.
There, we
have the base. Now we need to make the model look bloody and gore, and for
that, we will need overlays, stock images and brushes. I will gladly provide
the overlays and stock images I used to do it:
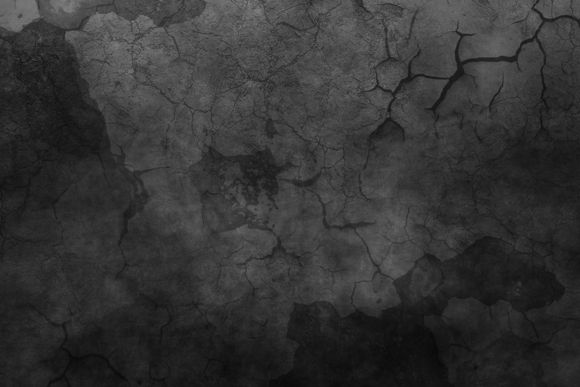
The overlay
1 image was used by me to give that veiny look to the skin, even though the
image itself is of cracks, and the overlay 2 is the image I used for the skin
wound on the arm. It's quite easy to work with that; just place the images in
the file you're in, above all the layers, and just play around with the Blending Modes. For the overlay 1, I
used the Soft Light blending mode,
and that's what I got:

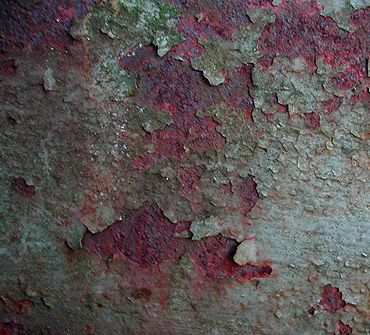
Same goes
to the Overlay 2 image, but I used there the Linear Light blending more, with 80%
of opacity and I changed the colour of the overlay, adding more red to it. That's
what I got:

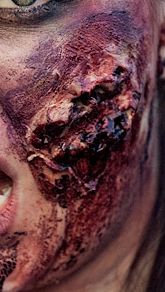
We already
have quite the effect, do we not? But let's proceed to the blood and wounds. Open
the Stock 1 and Stock 2 images that I have provided. As you can see, the Stock
1 is an image of a serious cheek wound, and the Stock 2 is an image of a
bruise. You can apply them using the same steps as for the Overlays. The Cheek
Wound required more editing, because you need to erase parts so it would fit
your manipulation, set it to Soft Light
blending mode, then I duplicated the stock image, and set the opacity of the
second one to 37%. As for the bruise, you can apply it anywhere you desire,
however I thought it looked good on the forehead, using the Darken blending mode, with 86% of
opacity. And that's what I got out of it:

Play around
with the blending modes, with the contrasts and colours, because every image is
different and for each one of them, you would need to edit the overlays and the
stocks for them to fit the picture. That's how it is, and that's how it always
will be.
I thought
that the face needed some blood spatter, so I used one of my brushes to do it.
I do not recall where I got them from, but I shall find them and post links to
them. Meanwhile, use one of your own, or download one from one of the resource
websites. I tutorial about blood effect was also requested, but while I do not
have one up yet, I will simply advice you to use brushes, and also play in the
blending mode with them.
Almost
everything is ready, but when we look at the image, we can see that something
is missing, something is not right, and I'll tell you what - look at the teeth.
How often did you see a decomposing Zombie having such perfect white teeth? Never,
I would say. So, we need to change that. Zoom in on the teeth, create a new
empty layer and select the Brush Tool.
Choosing the #846d4f colour, paint over the teeth (on top and near the lip at
the bottom), then apply the Color Burn
blending mode with 86% of opacity, to have that dirty look to them.

Now we have
the image more of less ready to be posted, but it's not looking natural just
yet. Flatten all the layers, and open the Curves
window, to make the image darker and raise the contrast:

After
which, go into Selective Color, and
do the following:


You have
your Zombie manipulation done and ready. Mine looks slightly different, because
I also applied the Paint Daubs in the end, to enlighten the details, but that's
not necessary.
[!]: If you're not quite pleased with the outcome, and your image does not look scary, then using the Burn Tool and the Sponge Tool, work around the eyes (making them darker), and the cheeks and forehead (making them more desaturated).
[!]: If you're not quite pleased with the outcome, and your image does not look scary, then using the Burn Tool and the Sponge Tool, work around the eyes (making them darker), and the cheeks and forehead (making them more desaturated).
Labels: angelina jolie, photoshop, resources, tutorial, zombie
Written on Tuesday 16 October 2012 at 08:02
by DefyingxMars