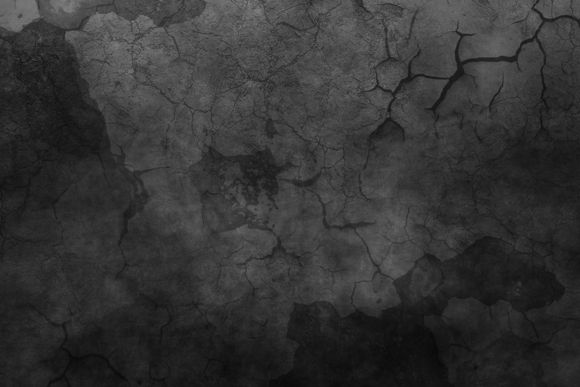
action 018.

The "tutorial" on how to use an action is in in the rar file.
Taking requests.
More here.
DOWNLOAD ACTION [RAR]
Labels: action, photoshop, resources, vampire diaries
Written on Monday 29 October 2012 at 05:20
by DefyingxMars
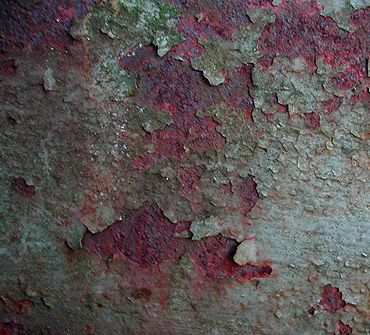
action 017.

The "tutorial" on how to use an action is in in the rar file.
Taking requests.
More here.
DOWNLOAD ACTION [RAR]
Labels: action, daenerys targaryen, game of thrones, photoshop, resources
Written on at 05:11
by DefyingxMars

Written on Wednesday 17 October 2012 at 01:09
by DefyingxMars
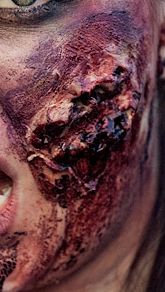
Photoshop tutorial 005.
PHOTOSHOP TUTORIAL 005
Create a Zombie.
Create a Zombie.
I have a
quite big list of requests now, so let's start with those, and let's make a
Zombie, but not a pretty girly-like zombie - we will make a horrific, gore and
bloody meat eater. I chose an image of Angelina Jolie, but you can pick
whomever you want. To create such an image, I used quite a lot of stock:
overlays and wounds. You can always create your own wounds, but the easiest way
is to use stock images. I will share the ones I used, no worries. I also used
brushes for blood, however I do not recall the exact place where I got them
from, but I will try to find them and post a link to them.

Let's
start, shall we? Open your image in PhotoShop and create a double layer of the
original. At first, we will need to make the skin look somewhat greenish slash
desaturated, because the model should look dead, so using the second layer we just
created, open Color Balance: Image -> Adjustments
-> Color Balance, and play around in there, to make look the skin somewhat
green (not too green, we are not creating an alien). After which, go into Hue/Saturation
(it's just above Color Balance) and move the Saturation line slightly to the left,
just enough for the skin to look pale and give away the sensation of the person
to be dead, because the skin turns grey after death, but the one of Zombies has
that greenish contrast, that we desire to reproduce. Once you have what you
wanted, select the Eraser Tool and erase everything but the skin (in the end,
only the skin must remain). Since we have our original layer beneath, it's like
we only changed the colour of the skin (be sure to erase the hair also). That's
what I got after that step:

Now, let's
take care of the eyes. As you know, Zombies have empty soulless look to them,
so that's what we will do to our image. Cut out the eyes of the layer using Lasso Tool (select them and then do CTRL
+ J), and then using Curves and Selective Color, make the eyes look
whitish, after which, remove the light reflections in them with Clone Stamp Tool.
There, we
have the base. Now we need to make the model look bloody and gore, and for
that, we will need overlays, stock images and brushes. I will gladly provide
the overlays and stock images I used to do it:
The overlay
1 image was used by me to give that veiny look to the skin, even though the
image itself is of cracks, and the overlay 2 is the image I used for the skin
wound on the arm. It's quite easy to work with that; just place the images in
the file you're in, above all the layers, and just play around with the Blending Modes. For the overlay 1, I
used the Soft Light blending mode,
and that's what I got:

Same goes
to the Overlay 2 image, but I used there the Linear Light blending more, with 80%
of opacity and I changed the colour of the overlay, adding more red to it. That's
what I got:

We already
have quite the effect, do we not? But let's proceed to the blood and wounds. Open
the Stock 1 and Stock 2 images that I have provided. As you can see, the Stock
1 is an image of a serious cheek wound, and the Stock 2 is an image of a
bruise. You can apply them using the same steps as for the Overlays. The Cheek
Wound required more editing, because you need to erase parts so it would fit
your manipulation, set it to Soft Light
blending mode, then I duplicated the stock image, and set the opacity of the
second one to 37%. As for the bruise, you can apply it anywhere you desire,
however I thought it looked good on the forehead, using the Darken blending mode, with 86% of
opacity. And that's what I got out of it:

Play around
with the blending modes, with the contrasts and colours, because every image is
different and for each one of them, you would need to edit the overlays and the
stocks for them to fit the picture. That's how it is, and that's how it always
will be.
I thought
that the face needed some blood spatter, so I used one of my brushes to do it.
I do not recall where I got them from, but I shall find them and post links to
them. Meanwhile, use one of your own, or download one from one of the resource
websites. I tutorial about blood effect was also requested, but while I do not
have one up yet, I will simply advice you to use brushes, and also play in the
blending mode with them.
Almost
everything is ready, but when we look at the image, we can see that something
is missing, something is not right, and I'll tell you what - look at the teeth.
How often did you see a decomposing Zombie having such perfect white teeth? Never,
I would say. So, we need to change that. Zoom in on the teeth, create a new
empty layer and select the Brush Tool.
Choosing the #846d4f colour, paint over the teeth (on top and near the lip at
the bottom), then apply the Color Burn
blending mode with 86% of opacity, to have that dirty look to them.

Now we have
the image more of less ready to be posted, but it's not looking natural just
yet. Flatten all the layers, and open the Curves
window, to make the image darker and raise the contrast:

After
which, go into Selective Color, and
do the following:


You have
your Zombie manipulation done and ready. Mine looks slightly different, because
I also applied the Paint Daubs in the end, to enlighten the details, but that's
not necessary.
[!]: If you're not quite pleased with the outcome, and your image does not look scary, then using the Burn Tool and the Sponge Tool, work around the eyes (making them darker), and the cheeks and forehead (making them more desaturated).
[!]: If you're not quite pleased with the outcome, and your image does not look scary, then using the Burn Tool and the Sponge Tool, work around the eyes (making them darker), and the cheeks and forehead (making them more desaturated).
Labels: angelina jolie, photoshop, resources, tutorial, zombie
Written on Tuesday 16 October 2012 at 08:02
by DefyingxMars
RR Banner PSD 002.

Used fonts: "Trajan Pro", "Nina Script Demo", "Taller Evolution Rev".
Taking requests.
More here.
DOWNLOAD PSD FILE [RAR]
Written on Monday 15 October 2012 at 14:23
by DefyingxMars
RR Banner PSD 001

Used fonts: "Trajan Pro", "Thin Pencil Handwriting (OT1)".
Taking requests.
More here.
DOWNLOAD PSD FILE [RAR]
Written on at 14:18
by DefyingxMars
Display Names.
Display Names.
| In this section will be posted the different nicknames of the canon characters from shows and movies that were written down by me. You are free to use that information for anything you desire: display name of your profile, banner tags and even wallpapers. The appearing nicknames are not from all the seasons nor all the episodes. They were written down randomly while watching the episodes throughout the last two years. |
ANGEL.
Angel/us:
* By Himself;
Winning Team Kind of a Guy
Angel Ink
* By Connor;
Prince of Lies
Self-righteous Bastard
* By Cordelia;
Angie
Mister Bumpy Face
* By Darla;
My Boy
Darling Boy
* By Faith;
Princess
* By Gunn;
Prince of Darkness
* By Lorne;
Angel-Cakes
Mister Dad
Re-insouled Leader
* By Wesley;
Some Bastard
* By Others [Humans / Demons]:
Vampire Priest
Heraldo Angel
Noble Warrior
Alpha Vampire
Super Hoc
Soul Boy
Tarzan
Dead Thing
* ALIAS:
Vampire Priest
Heraldo Angel
Noble Warrior
Alpha Vampire
Super Hoc
Soul Boy
Tarzan
Dead Thing
* ALIAS:
Darla:
* By Drusilla;
Grandmum
* By Others [Humans / Demons]:
The Mother
Demon Bitch
The Female
* ALIAS:
The Mother
Demon Bitch
The Female
* ALIAS:
Harmony Kendall:
* By Herself;
Buffy's Arch-Nemesis
Actual Girlfriend
Evil Fighter
* By Cordelia;
Harm
* By Drusilla;
Little Girl
* By Gunn;
Blanco
Undead Tourist
* By Spike;
Silly Bent
Sweet Brads
* By Xander;
Simpleton
* By Others [Humans / Demons]:
Little Cacophony
Unharmony
* ALIAS:
Little Cacophony
Unharmony
* ALIAS:
Cordelia Chase:
* By Herself;
Hotline Power
Bubble Head
Powerful Witch
Amnesia Action Figure
Floaty Girl
* By Gunn;
Wild Man
* By Layla;
Twinkie
* By Willow;
Skanky Ho
* By Others [Humans / Demons]:
The Cow
Direct Link
Masaya
The Concubine
Ex Cheerleader
Champion
Hell of a Lady
Great Warrior
Higher Being
Lady Luck
* ALIAS:
The Cursed One
Sovereign of Death
Royal Highness
Pure Sight
Transcended One
The Cow
Direct Link
Masaya
The Concubine
Ex Cheerleader
Champion
Hell of a Lady
Great Warrior
Higher Being
Lady Luck
* ALIAS:
The Cursed One
Sovereign of Death
Royal Highness
Pure Sight
Transcended One
Winifred 'Fred' Burkle:
* By Herself;
Little Mouse
* By Cordelia;
Taco Freak
Quiet One
* By Connor;
Tazer Girl
* By Gunn;
Hot Mama
Unstoppable
Mini
* By Gwen;
Cherry
* By Lorne;
Burke Vibe
* By Others [Humans / Demons]:
The Cow
* ALIAS:
The Cow
* ALIAS:
Charles Gunn:
* By Himself;
The Muscles
* By Gwen;
Damsel
* By Lorne;
Kiwi
* By Others [Humans / Demons]:
* ALIAS:
* ALIAS:
Gwen Raiden:
* By Herself;
Freak
Professional Thief
Good Thief
* By Cordelia;
More Lying
Super Tramp
* By Gunn;
Electro Gwen
* By Others [Humans / Demons]:
Span Dacia
Dangerous Freak
* ALIAS:
Electro Girl
Span Dacia
Dangerous Freak
* ALIAS:
Electro Girl
Wesley Wyndam-Pryce:
* By Himself;
Head Boy
* By Angelus;
English Pig
* By Cordelia;
Head Cheese
* By Faith;
Boy Hostage
* By Gunn;
English
Headless Boy
* By Others [Humans / Demons]:
Failed Watcher
Talking Meat
* ALIAS:
The Watcher
Failed Watcher
Talking Meat
* ALIAS:
The Watcher
Connor:
* By Darla;
Little Parasite
* By Faith;
Super Being
The Kid
Deficient Brat
* By Gunn;
Blind Instrument
Offspring
* By Wesley;
The Unborn
* By Others [Humans / Demons]:
* ALIAS:
Connor Angel
Connor Reilly
Steven Franklin Thomas Holtz
Miracle Child
Special Child
Bringer of Death
The Destroyer
Bringer of Agony
* ALIAS:
Connor Angel
Connor Reilly
Steven Franklin Thomas Holtz
Miracle Child
Special Child
Bringer of Death
The Destroyer
Bringer of Agony
Lorne:
* By Himself;
Cheap Fortune Cookie
Lean Mean Belly Reading Machine
* By Others [Humans / Demons]:
* ALIAS:
Green Demon
Pylea Resident
* ALIAS:
Green Demon
Pylea Resident
VAMPIRE SLAYER.
Buffy Summers:
* By Herself;
Just a Killer
Wrong Gal
Jon
Female Someone
Superhero or Something
Just a Tool
The True Warrior
Strong Woman
* By Andrew;
Sabrina
* By Anya;
Pudding
* By Cordelia;
Freak of Nature
All Powerful Buffy
* By Dawn;
Iron Chief
Broken Record
Genitor of Bad-Day Club
* By Glory;
Little Girl
Sweetie
Tinny Queen
Bug
Crap Nut
* By Joyce;
Demon Child
The Survivor
* By Spike;
Self-Involved
Death Wish Bitch
Big Sister
Hero Type
Not So Pleasant Buffy
A Tease
Tease Queen
Ice Queen
Little less Human
Spooked Love
Poor Little Lost Girl
Groupie
Goldilocks
Too Twisted
* By Tara;
Refreshing Sanity
* By Warren;
Super Bitch
* By Willow;
Motivated Buffy
School Suck-up
Warrior of the People
Rusty Girl
Buzz Kill
Super Bitch
Wrong Gal
* By Xander;
Champ
Sex-Monkey
* By Others [Humans / Demons]:
Professor
Little Britney
Bad News
Princess
* ALIAS:
The Slayer
Chosen One
Good Slayer
Miss Summers
Anne
Professor
Little Britney
Bad News
Princess
* ALIAS:
The Slayer
Chosen One
Good Slayer
Miss Summers
Anne
Faith Lehane:
* By Herself;
Real Killer
Dust in the Wind
Candle in the Wind
* By Angel/us;
Fire Girl
Faithy
Bloody Whimpering Bunny
Cupcake
* By Cordelia;
Psycho Slayer
* By Fred;
Super Girl
* By Lorne;
Princess
* By Others [Humans / Demons]:
* ALIAS:
The Slayer
Rogue Slayer
Dark Slayer
* ALIAS:
The Slayer
Rogue Slayer
Dark Slayer
Anya Jenkins:
* By Herself;
Working Gal
Butter Fingers
Slippery Slip
Newly Human
Strangely Literal
Ex Demon
Finesse Coming Out of the Bottom Girl
Almost In Charge
Young Heart
Enya
Sex Puddle
* By Giles;
Bunny Maker
Silly Girl
* By Spike;
Trollop
Tardy Step-Mom
* By Willow;
The Fish
Rabbit Phobia
* By Xander;
Cutest of the Scooby's
Like a Thousand
* By Others [Humans / Demons]:
* ALIAS:
Vengeance Demon
Anyanka
Ex Vengeance Demon
* ALIAS:
Vengeance Demon
Anyanka
Ex Vengeance Demon
Dawn Summers:
* By Herself;
President of Bad-Day Club
A Thing
Not Anything
Wet Rat
Not Real
Destroyer of the Universe
Mature Enough
Bad to the Bone
Imad
* By Anya;
Illegal Child
* By Buffy;
So Annoying
Kid Sister
The Freak
Hair-Puller
Very Short Annoying Man
Not Real
Dummy
* By Giles;
Actual Living Energy
* By Glory;
The Key
Sassy
The Darlingness Thing
Bright Green Swirly Shimmer
Totally Evil
Fox
Tiny Snap Dragon
Very Irritating
Chicka
* By Joyce;
Pumpkin Belly
* By Riley;
Kid
* By Spike;
Rat Kid Sister
Energy
Mystical Glowy Key Thing
Blob of Energy
Fourteen-Years-Old
Hormone Bomb
Little Bit
Bitty Buffy
Pigeon
* By Willow;
Big Spaatz
The Baby
Little Miss Summers
Kinda New
Kitty
Mystic Ball of Energy
Little Energy Ball
* By Xander;
Dawn-Master
Big Energy Gal
Naughty Booz-Hound
Dawnster
* By Others [Humans / Demons]:
Destroyer
Bleeding Sky
Freaky Cool
Absolute Power
* ALIAS:
The Key
Destroyer
Bleeding Sky
Freaky Cool
Absolute Power
* ALIAS:
The Key
Rupert Giles:
* By Anya;
Stupid-or-Something
Terrified Old Man Wetting Himself
Silent Oversea
Not the Magic Guy
Paper Work Type
Rupie
* By Dawn;
Far Gone
Old Guy
* By Spike;
Gramps
Captain Slow-Pop
Shop Keeper
* By Willow;
Daddy
Not Relevant
Chief
Such a Hypocrite
* By Xander;
Book Guy
Big G.
* By Others [Humans / Demons]:
* ALIAS:
The Watcher
* ALIAS:
The Watcher
Willow Rosenberg:
* By Herself;
Snippy Gal
Multi-Cultural
Not a Gun
Pointy Stick
Kinda Gay
Plain Old Willow
Super Willow
Finny McFine
The Magics
A Junky
Mousy Way
Side Man
Turned Pro
Way Avoidy
* By Andrew;
Star Phoenix
Wicca Bitch
* By Anya;
Biggest Sitting-Around
Most Powerful Wicca within the Atmosphere
Real and Dangerous
* By Buffy;
Wiley Willow Charms
The Biggest Gun
Strongest Person
Best Shot
* By Cordelia;
Poor Defenseless Willow
Redheaded Meddler
* By Dawn;
Awesomest Person
* By Giles;
Arrogant Amateur
* By Oz;
Evil Master Mind
* By Rack;
Strawberry
Little Slip of a Girl
Full of Dark Juice
Taste of Strawberry
* By Tara;
Vixen
* By Xander;
Boss in the Group
All Wrathy
Black Eyed Girl
Crayon Breaky Willow
Scary Veiny Willow
Hot Goober Witch
* By Others [Humans / Demons]:
Not a Bad Person
* ALIAS:
The Witch
Dark Witch
Not a Bad Person
* ALIAS:
The Witch
Dark Witch
Xander Harris:
* By Himself;
Xand-Face
Xand-Man
Big Funny Xander
Pervert
Swell Bowler
Marveling Immaturity
Captain Logic
Hero of the Peace
Spider Eating Man Bitch
Butt Monkey
* By Anya;
Sweet Cookie Face
Captain Scared
Scared Insecure Little Boy
* By Buffy;
Love Sick Puppy
Clock-Field Time
Puffy Xander
* By Riley;
Cry Baby
Dork
* By Spike;
Monkey-Boy
Shrimp
Glorified Brick-Layer
King of the Big Exit
The Great Xander
* By Willow;
Mr. Stuffy Pants
* By Others [Humans / Demons]:
* ALIAS:
* ALIAS:
Drusilla:
* By Herself;
Happy Memory
* By Harmony;
Queen of the Damned
Drud-Zilla
Morticia
* By Spike;
Face of Salvation
Black Beauty
* By Xander;
Nut Sack
* By Others [Humans / Demons]:
* ALIAS:
* ALIAS:
Spike:
* By Himself;
Big Bad
Lucky Pluck
Driven Yellow Snow
Sinister Attraction
Daddy
The Rebel
Small Talk Boy
Randy Giles
Horny Giles
Desperate Fresh Shag
Noble Vampire
Good Guy
On the Mission of Redemption
Vampire with a Soul
Creature of the Night
Toothless
Evil Soulless Thing
* By Buffy;
Peroxided Pest
Serial Killer in Prison
Pretty Twisted
Sick Miserable Vampire
Prince of a Guy
Jessica Fletcher
Not a Man
Evil Disgusting Thing
House Broken
Just Convenient
Dead Inside
Mr. Passive Aggressive Guy
* By Drusilla;
Naughty Wicked Spike
Bound to Slash
Bound to Bleed
Beautiful Poetry
Tinker Toy
Bad Dog
Darling Deadly Boy
* By Harmony;
Blondie Bear
Spikey
My Little Lamb
Sweet Boo-Boo
* By Glory;
Impure
Completely Useless
Precious
Not Very Fancy
Needy Blood Sucker
* By Xander;
Evil Dead
Brutal Killer
Bleach Boy
Strong and Mysterious
Compact and Well Muscled
Undead Man Walking
Captain Peroxide
Willie Wanna Bite
Mr. Attempting Rape
* By Others [Humans / Demons]:
Mr. Negative
Legendary Dark Warrior
Castrated Vampire
Pathetic Excuse for a Demon
* ALIAS:
Number 17
Patient 17
Seventeen
William the Bloody
The Doctor
Mr. Negative
Legendary Dark Warrior
Castrated Vampire
Pathetic Excuse for a Demon
* ALIAS:
Number 17
Patient 17
Seventeen
William the Bloody
The Doctor
Andrew:
* By Anya;
What's-His-Face
Annoying Virgin
* By Jonathan;
Sadness Personified
* By Willow;
Dead Man Walking
* By Xander;
Boneless Chicken
Social Retard
* By Others [Humans / Demons]:
* ALIAS:
* ALIAS:
Joyce Summers:
* By Herself;
Woman with a Hole in her Skull
* By Buffy;
Flower Getting Lady
* By Others [Humans / Demons]:
* ALIAS:
* ALIAS:
Jonathan:
* By Andrew;
Jerkathan
The Left Behind
* By Willow;
Dead Man Walking
* By Xander;
Dabble Boy
Skinless Chicken
Social Retard
* By Others [Humans / Demons]:
* ALIAS:
* ALIAS:
'Oz':
* By Buffy;
Not Just Animal
* By Willow;
Hot and Cold
Loop Warm and Cold
* By Others [Humans / Demons]:
* ALIAS:
* ALIAS:
Tara:
* By Anya;
Miss Psychopath Squad
* By Buffy;
Not Thrilling
* By Dawn;
Laugh Riot
* By Xander;
Tinker Bell
* By Others [Humans / Demons]:
* ALIAS:
* ALIAS:
Riley Finn:
* By Himself;
A Civilian
* By Buffy;
God of Boyfriends
Cookie Helper
* By Spike;
Captain Cardboard
Piss and Glance
Charlie
Not Dark Enough
* By Xander;
Heart Breaker
Married Man
Jungle Cat
* By Others [Humans / Demons]:
* ALIAS:
* ALIAS:
April (Robot):
* By Buffy;
Robot Chick
Crazy Strong Lady
The Toy
Crazed
* By Tara;
Stamp Plastic
* By Willow;
Code Pink
* By Xander;
Sexbot
* By Others [Humans / Demons]:
* ALIAS:
* ALIAS:
BubbyBot:
* By Anya;
Descendent of a Toaster Oven
* By Buffy;
Skirt Girl
IT.
* By Giles;
BuffyBot
* By Spike;
Shinny Plastic
* By Others [Humans / Demons]:
A Machine
Synthetic Ass
Decoy
Pretty Toy
Nothing but a Toy
* ALIAS:
A Machine
Synthetic Ass
Decoy
Pretty Toy
Nothing but a Toy
* ALIAS:
Gloryficus:
* By Herself;
The Victim
Boundary Issues Girl
Holy Name
God in Exile
* By Buffy;
God from the Bitch Dimension
Hell Bitch
Not the Brightest God in the Heavens
* By Giles;
Young Woman
Ambiguous Evil
* By Spike;
Idiot
God of Bad Home Poems
Cheap Harish Fashion Victim Ex God
* By Xander;
Slay Master General
Creepy Demon Girl
Resident Beasty Sumner
Crazy Hell God
* By Others [Humans / Demons]:
Mysterious Woman
Stronger Instrument
Big Blondie-wig
Most Beautiful and Supremely Magnificent One
Most Tingly and Wonderful Glorificus
Shiny Special One
Elaborate Marvelousness
Terrifically Smooth One
Creamy Corneas
Ultimate Merciful One
Most Skokie Glorificous
Your Most franc and Cleanness
The Magnificent Glory
Beauteous Glory
Extremely Forgiving
Your Conceivableness
Most Highest You
Good One
Most Glamorous yet Tasteful One
Sacred Glorificus
Stunning One
Magnificent Incandescence
Divine Greatness
Most Sweating Noisy Feelings Causing One
* ALIAS:
Glory
The Beast
That Which Cannot-be-named
The Abomination
CHARMED.
Piper Halliwell:
* By Chris;
Grounded Control
* By Others:
New Savior
Master of Good
Champion of Excalibur
* ALIAS:
Witch
Charmed One
New Savior
Master of Good
Champion of Excalibur
* ALIAS:
Witch
Charmed One
Phoebe Halliwell:
* By Paige;
Passive Aggressive
Witch's Advocate
Slightly Over-Dramatic
* By Piper;
French Hooker
* By Cole;
Ex-Wife
My Witch
* By Others:
* ALIAS:
Witch
Charmed One
* ALIAS:
Witch
Charmed One
Paige Matthews:
* By Herself;
Half White-Lighter
Warrior Witch
* By Phoebe;
Devil's Advocate
Demon's Bate
Warrior Princess
* By Cole;
Long Lost Child
Red Head
* By Others:
* ALIAS:
Jo Bennett
Whitelighter
Witch
Charmed One
* ALIAS:
Jo Bennett
Whitelighter
Witch
Charmed One
Cole Turner:
* By Phoebe;
Invincible Husband
* By Piper;
Smart One
Demonic Pervert
* By Others:
Bossy-Boots
Demon Hybrid
* ALIAS:
Demon
Balthazar
Source of all Evil
Bossy-Boots
Demon Hybrid
* ALIAS:
Demon
Balthazar
Source of all Evil
Sam Wilder:
* By Phoebe;
Biological Father
* By Paige;
Stranger
* By Others:
* ALIAS:
* ALIAS:
Leo Wyatt:
* By Himself;
Sun God
* By Paige;
Orbus Interaptus
* By Others:
* ALIAS:
* ALIAS:
Chris Halliwell:
* By Piper;
Future Boy
Orb-Ass
Peanut
* By Paige;
Future Man
* By Others:
* ALIAS:
* ALIAS:
Bianca:
* By Piper;
Future Girl
Phoenix
* By Phoebe;
The Fiancee
* By Others:
* ALIAS:
* ALIAS:
Wyatt Halliwell:
* By Piper;
Source of All Evil
* By Others:
The Reborn
The Ultimate Power
The King
* ALIAS:
The Reborn
The Ultimate Power
The King
* ALIAS:
SUPERNATURAL.
Dean Winchester:
* By Himself;
Batman
No Daddy
A Bad-Ass
Poky
Ninja
Angel Condom
Old Chicken
Titanic
Young at Heart
Rocking Fella
* By Uriel;
Savage
Meat-on-two-legs
* By Bela;
Tiger
Serial Killer
O-For-Two
* By Bobby;
Angel's Bitch
Heaven's Sucker
Princess
Stupid Stupid Son of a Bitch
Whiny Brat
Grandma
* By Ruby;
Jack-ass
Shortbus
Dumb Spineless Dick
* By Pamela;
Chachy
Hot Shot
Hero
* By Sam;
Dude
Mr. Wizard
Nine-year-old
Michael's Muppet
* By Other Humans:
The-Dean
Best-Night-of-my-Life Dean
Hannibal Lecter
Hellhounds Chew Toy
Demon's Bitch Boy
All Kinds of Messed Up
First Born Son
Sugar
Queen
* By Other Hunters:
Rare Individual
* By Other Demons:
Walking-Billboard-of-Gluttony-and-Lust
Puppy Chow
Lucky Duck
Special Boy
VIP Ass
Hardy Boy
Filthy Bag
Deano
Kiddo
* By Other Angels:
Michael's Sword
The Vessel
Michael's Vessel
Chuckle Head
Just Human
Michael’s Receptacle
* ALIAS:
Mr. Sniderson
Mr. Hegar
Agent Bonom
Agent Paige
Sam Winchester:
* By Himself;
Whole New Level of Freak
Crappy Student
Piss-Poor Excuse for a Son
* By Castiel;
Boy with Demon Blood
* By Dean;
Slippery-Slop
Weirdy McWeirdenson
Jinx
Piece of Art
Grinch
Antichrist Super-Star
Demon BFF
Lucifer’s Prom Date
Cutter
Dropout
Overgrown Man
* By Ruby;
Damsel in Distress
Antichrist Thing
Soul Survivor
Psychic Kid
Special Boy
Pretty Big Deal
My Boy
Twelve Years Old Girl
Dumbo
* By Other Humans:
Smoking Drug
* By Other Hunters:
Mathlete
More-than-a-Monster
The Adversary
Demon Problem
Spooked Pal
* By Other Demons:
Hero
Real Hero
The Prodigy
The Boy-King
Piss-Poor Human
Brother’s Keeper
Magnum
98 Pounds of Nothing
Young Skywalker
Mopped Limber Jack
Sloppy Bitch
* ALIAS:
Fill Jones
Edgar Casey
Agent Copland
Agent Plantain
Bela Talbot:
* By Herself;
Great Thief
* By Dean;
A Thief
Glass-Half-Full
Truly Awful Person
A Great Thief
* By Other Hunters:
Real Dangerous
* ALIAS:
Lugosi
Alex
Mina Chandler
Real Dangerous
* ALIAS:
Lugosi
Alex
Mina Chandler
Bobby Singer:
* By Himself;
Ditchable Prom-Date
* By Castiel;
Old Drunk
* By Dean;
J-Man
Idiot
Yoda
* By Others:
Town Drunk
* ALIAS:
Town Drunk
* ALIAS:
Gordon Walker:
* By Himself;
A Monster
Blood-thirsty Killer
* By Dean;
Stupid Son of a Bitch
Super Gordon
* By Others:
* ALIAS:
* ALIAS:
Anna:
* By Dean;
Angel Radio
Super Gordon
* By Others:
* ALIAS:
* ALIAS:
Castiel:
* By Himself;
Fallen Angel
Winchesters Guardian
New God
Next Lucifer
* By Bobby;
Superman Who’s Gone Dark Side
* By Crowley;
Righteous Cas
The Good Cas
The Whore
Kitten
Angel Leader
Candy Boy
God’s Favourite
New Sheriff Upstairs
* By Dean;
Hammer
Righteous
Holy-Thing on an Unholy Mission
Bad Apple
Spineless Soulless Son of a Bitch
Dead Man
Hippy
Little Nerdy Dude with Wings
Mr. Compton
Happy Meal
Caroline
Little Angel
God
New Sheriff in Town
Suck-in-Goodbyes
Big Kahuna
Smity McSmiterson
Baby in a Trench-Coat
Junkless Sissy
* By Ellen;
Big Boy
* By Lucifer;
Peculiar Thing
Public Enemy
* By Others:
* ALIAS:
Angel of Thursday
* ALIAS:
Angel of Thursday
Archangel Michael:
* By Bobby;
Heavenly Dust
* By Dean;
Cate Blanchett
Butter Cup
* By Castiel;
Ass-Butt
* By Others:
* ALIAS:
* ALIAS:
Zechariah:
* By Dean;
Ass Head
Two-Faced Douche
Ghost of Christmas-screwed-you
* By Others:
* ALIAS:
* ALIAS:
Alaister:
* By Ruby;
Picasso with a Razor
* By Others:
* ALIAS:
* ALIAS:
Casey:
* By Herself;
Open Book
* By Bobby;
Demon Girl
* By Others:
* ALIAS:
* ALIAS:
Crowley:
* By Himself;
Hades
* By Dean;
Satan Junior
* By Others:
* ALIAS:
Crossroad Demon
King of the Crossroad
King of Hell
* ALIAS:
Crossroad Demon
King of the Crossroad
King of Hell
Ruby:
* By Herself;
Little Fallen Angel
Coma Girl
Most Loyal
* By Dean;
Obedient Little Bitch
Mass-Chick
Ruby-Girl
Hot Stuff
Bitch
Black-eyed Skunk
Slutty Little Yoda
* By Sam;
Cold Bitch
Lying Bitch
* By Others:
Demon Bitch
* ALIAS:
Demon Bitch
* ALIAS:
Lucifer:
* By Himself;
Next Best Thing
* By Bobby;
Big Boss
* By Others:
Father
Morning Star
Bratty Child with a Tantrum
* ALIAS:
Father
Morning Star
Bratty Child with a Tantrum
* ALIAS:
Lisa:
* By Sam;
Random Chick
* By Dean;
Yoga Teacher
Gumby Girl
* By Others:
* ALIAS:
* ALIAS:
The Angels:
* By Dean;
Bigger Picture Kinda’ Guys
Shady Politicians from planet Vulcan
Dicks
The Demons:
* By Dean;
Black-Eyed Bitches
Bitch Bloods
Supernatural Piece of Crap
Cockroaches
Labels: angel, buffy, charmed, information, role-play, supernatural
Written on Thursday 11 October 2012 at 11:33
by DefyingxMars
Photoshop tutorial 004.
PHOTOSHOP TUTORIAL 004.
Create a GIF
So, going
through the requests, I have seen a very interesting one, much different from
all the others - a request for a tutorial on how to make GIFs through
Photoshop. Therefore, we'll be doing that today.
Basically,
I have a couple of examples of how it can be done, yet in all of them, you
would need some sort of video editing program, and here's the reason why:
#1 - in the
first example, you will be needing a video clip that you will want to turn into
a GIF
#2 - and in
the second example, you will need to create your own screen-captures to make a
GIF (HOWEVER, if you have a player that allows to take screen-captures (for
example: GOMplayer), then it will do.)
First,
let's create a GIF with the first technique:
Once you
have a video clip that you would want to turn into a GIF (in an AVI or MOV
[quicktime] format), open your Photoshop (x86) and do the following:
File -> Import -> Video Frames to
Layers
Find your
video clip on your computer, select it and click on "Load".
Once you
have done that, a little window will pop out looking like this:

Keep
everything as it is, however, to shorten the images in the GIF, thus make the
size of smaller, limit to every 2 or even 3 frames the file. Then click on OK.
Now the images will load, and it might take a couple of seconds, so don't panic
if it's not opening like a normal image right away. Once it's opened, it will
be in its original video size, and for me that is 1280x720 px, which is way too
big for a GIF. I will change the size to 310px in width, at first, because when
you change the size of a set of images like it, it always leaves some sort of
transparent tiny line on the sides, and I will try to avoid that. And NOW, I
will cut the image on the sides, so we don't have any unneeded lines appearing:
open the Canvas Size and cut somewhere 10px in width and height. There, it's
pretty now, but it's still not a GIF - it's just a set of images, however,
before making anything move just yet, I'd like to apply a colouring to the gif,
and for that ALWAYS use PSD colourings that you simply can grad on top of your
layers, otherwise you'll be making this GIF for years and years. (Or, if you
create your own colourings, just create filter
adjustments and put them all above of all the layers). I applied a quick
edit, and I'm ready to make it into a moving image.
Click on
Window and then on Animation, and a little window will pop out at the bottom of
the screen - that's how you make your image move. The next few steps will
contain a lot of captures, because I will be needing to show you the steps, for
you to properly understand them.
That's how
the window will look like:

However,
you will need to fix the speed to 0,1 f/s, and for that you must select all of
the layers in the Animation Window (click on the first layer, hold SHIFT and
then click on the last layer), after which click on the time set and choose 0,1
seconds.

Click on
play to see the outcome.
To save a
GIF, you need to click on File -> Save for Web&Devices and then click on
Save (check that the format is GIF and not something else, in the window that
will pop out during the savings)
TO TAG A
GIF BEFORE SAVING IT:
To tag a
GIF is very easy also; all you have to do is add a text while being on the
first layer of the Animation window. I'll tag mine with "DefyingxMars.
Anya A. tutorials", click on play to make sure that the tag is present on
all the layers (if it's not, then while being on the first layer of the
Animation window, create copies of the tag layers in the Layers Window and
delete the old ones, this way all the Animation layers will have the tag in the
same place), and then save the GIF.
There, that
is the easiest way to make GIFs, however it's not always the better one, seeing
as how, for example, on tumblr, you have a size limit, therefore you need to
literally count the layers allowed in one file. So, in such cases, you can
create a GIF using the cap-by-cap example, and for that, you would need
screen-captures of the moment (second by second).
Once you
have the screen captures you need, go to Photoshop and click on
Files ->
Scripts -> Load Files into Stack
after which
a little window will appear, looking like this:

Browse and
find the screen-captures on your computer, select them and click on OK, then
load them all into one file (just click on OK in the popped out window). From
there, you will have one file with lots of layers, and each of those layers
will be one of the screen-captures that you have uploaded. However, the
Animation window will contain only one layer, yet don't panic - you're one
click away from having the full set: click on the menu of the Animation window
and then click on "Make Frames from Layers". There, you have your
layers, and from that point, do the rest as I have explained above.
And joy,
you have your GIF, and mine looks like that:
Labels: kahlan amnell, legend of the seeker, photoshop, tutorial
Written on Wednesday 10 October 2012 at 17:15
by DefyingxMars
I shall try to create one tutorial a day, if I have the time for it. It's not a promise, however, with the amount of requests I got - we've got work to do (the requests are to be send to my tumblr page).
Written on Monday 8 October 2012 at 17:23
by DefyingxMars
Photoshop tutorial 003.
PHOTOSHOP TUTORIAL 003
Black Demon eyes.
Black Demon eyes.
Hello,
everyone...once more. Today I shall offer you another PhotoShop tutorial before
going about my business. I thought of a couple of requests that were made, and
I decided to do first the Demon-Supernatural show like manipulation -
aka applying black eyes to a model. It's very easy, to be quite honest,
all you have to do is to blacken the eyes and make it look realistic, so that
is what we will do right now. That is what we will be doing:

I. Open
your program and open an image of a model in it - no matter which one, but make
sure it's a HD picture, so the outcome will be pretty. I have chosen Adriana
Lima for it.
II. Our
first step is to make the black eyes. Indeed, we are that quick. In the opened
image, create a new layer and then using the Lasso Tool, select the area you will be filling with black. (Some
people, who do the same kind of edits, do not use Paint Bucket, but a Brush
Tool, however I find it easier and cleaner to just fill the area with the
colour instead of trying to apply the paint without going crazy and missing
spots. Now, with the area selected, simply fill it with the black colour. Don't
worry if the sides of the black spot are sharp, unrealistically looking and
seem weird. We will correct that in a few seconds.
III. Still
working with the new layer, select Blur
Tool in the Tool Box and apply it
to the sides of the black area. After which, select the Smudge Tool and drag the sides of the black spot so it would fit perfectly
the eye. There, normally you should have somewhat an already quite pretty
looking image.

IV. Now we
shall proceed on to the reflection, because, indeed, the eye must be black, the
pupils are black also, but the eyes always have a light reflection, and the
Demons have the same. Create another layer above the black spot, and select the
Brush Tool and a white colour. Create
three little spots on the eye; a big one and two little ones not far away from
one another. Set the layer to 75% of opacity, and then, select the Blur Brush and slightly apply the tool
on the spots, so they would look well fit to the picture.
V. Before
doing any further changes to the eyes, I decided to quickly apply a small
change of contrast to the image, so I tweaked it slightly in Curves. Don't go crazy there, because
the picture must still look normal. Once that is done, zoom in on one of the
eyes (we shall do the magic on one eye first, and then the second), select the
layer of the main picture (without merging the layers of the black spot and the
white reflections) and using the Burn
Tool, create shadows by the eye, so the black would fit more nicely to the
set, and the look would appear more fierce.

VI. Your
image is ready, but I decided to use some more effects, so the I applied Surface Blur and Paint Daubs. And there you go - your image is done.
Written on at 05:11
by DefyingxMars
Photoshop tutorial 002.
PHOTOSHOP TUTORIAL 002
Hello,
everyone. Let's create another PhotoShop tutorial today. I thought about
different possibilities, but let's try something easy to start off - creation
of an image of the sort:

It can be
used as an image for a tumblr, or a default for role-play websites such as
MySpace or RPme, and it is done in a few clicks. Indeed, it's THAT simple.
First, we
would need three screen-captures quite alike to one another, meaning - it must
be captures of a few seconds of difference.
When you
have opened all the three screen-captures in your program, resize them equally,
and drag them all into the empty image. (My file is of 500x520 px in size).
Now, you have a couple of possibilities - you can either make all three sides
equal, therefore just divide the width into three (500 / 3 = 166,66, however we
must have a round number, so we will make it 167, to not have any empty spaces
in-between the images), or you can do it as you feel it (that's how I cut the
images) and crop the images as you desire. Let's try exactly that: click on the
Rectangular Marquee Tool in the Tool Box that is on the side, then
select a precise spot of the image, and to cut the selected area (do CTRL + J). There, you have your first
screen-cap placed and ready. Do the same to the other two captures, and you
have your three "rectangles" finished. It should look something like
this:

I suppose
you have already figured out what kind of contrast you wanted for your image to
have, so I will let you pick a background colour. I have chosen #5c4732
Create a
new layout under the three screen-captures that we have (do not merge anything
just yet), select the Paint Bucket Tool
in the Tool Box, click on the Foreground Colour square and choose your
colour. Click ok. Now, click on your image, while your new layer is selected. You
have filled that layer with a new colour. (That was for those who haven't done
anything in Photoshop yet, because it's the basics, and I will not return to
that little part in the future tutorials).

The next
step is to make the top and bottom on the screen-captures to disappear and
merge with the background colour. Many simply erase the image, however I don't
like doing that, since there could be complications, or you might change your
mind while doing the edit, however the image will be already erased and you
won't be able to go back. So, what I do - is paint above the images with the
same colour as the background. Let's do that: create a new layer above all the
others, select the Brush Tool (Soft Round Pressure Size) and set the size of
the brush as you desire, but it must be big enough to cover the parts we need
to paint over. My brush size was of 123px. Now simply paint over. That's my
outcome of the test:

Then,
before we do any colourings of the image itself, I decided to add some shades,
lights and contrast, so; create a new layer above all the others, and using the
same brush tool, click once in the middle top of the image (with the colour set
on something lighter, and the size of the brush on much, much bigger). Once you
have your big drop of paint, set the Blending
Mode of the layer to Vivid Light.

Then you
can either merge all the layers and proceed to the colouring, or you can, at first,
add your text to the file (you can add the text later, I usually do how I feel
at the moment). Let's merge the image: in the top menu, select Layer and then
click on Flatten Image. There, you have your almost ready edit done, however it
is not finished just yet. Let's add a tag/text. There, you do your own magic,
and when you're done - throw a rock.
There. I'm
done. Let's continue and finish up our edit to move to more interesting things.
Once you have finished your text, merge all the layers once more - apply
your colouring, or an action - the image needs a colouring. After I have used
the Curves and some effects, I ended up having out much awaited outcome.
Labels: photoshop, resources, true blood, tutorial
Written on Sunday 7 October 2012 at 08:47
by DefyingxMars
PSD 003.

Used fonts: Shonar Bangla.
Taking requests.
More here.
DOWNLOAD PSD FILE [RAR]
Labels: angelina jolie, photoshop, PSD, resources
Written on at 06:47
by DefyingxMars
Soon I will be posting tutorials for videos. The program that I use is Vegas Movie Studio Platinum, however I know that most people use the version called "Sony Vegas Pro". It's basically the same thing - the difference is only in some of the effects. I am used to my program, but indeed, it does not allow to do as much as the casual Sony Vegas Pro, so I would advice you (if you don't have one of the programs already) to buy Sony Vegas directly, this way you will have all of the possibilities available for nice effects.
Movie Studio is much cheaper than Vegas Pro, and there is only about three or four missing effects.
Sony Software official website.
Even though, I got mine in a store, because I like to have a box, and a CD and everything that goes with the product.
Movie Studio is much cheaper than Vegas Pro, and there is only about three or four missing effects.
Sony Software official website.
Even though, I got mine in a store, because I like to have a box, and a CD and everything that goes with the product.
Labels: movie studio, sony vegas, tutorial, video, youtube
Written on Friday 5 October 2012 at 07:09
by DefyingxMars
PSD 002.

Used fonts: "Black Flag", "Don Quixote".
Taking requests.
More here.
DOWNLOAD PSD FILE [RAR]
Written on at 06:35
by DefyingxMars
PSD 001.

Used fonts: Angel Tears.
Taking requests.
More here.
DOWNLOAD PSD FILE [RAR]
Labels: gabrielle, photoshop, PSD, resources, warrior princess, xena
Written on at 06:12
by DefyingxMars
action 014.

The "tutorial" on how to use an action is in in the zip file.
Taking requests.
More here.
DOWNLOAD ACTION [RAR]
Labels: action, actions, photoshop, resources, seppia, spartacus
Written on Thursday 4 October 2012 at 17:48
by DefyingxMars
action 013.

The "tutorial" on how to use an action is in in the zip file.
Taking requests.
More here.
DOWNLOAD ACTION [RAR]
Written on at 17:42
by DefyingxMars
action 012.

The "tutorial" on how to use an action is in in the zip file.
Taking requests.
More here.
DOWNLOAD ACTION [RAR]
Written on at 17:39
by DefyingxMars
action 011.

The "tutorial" on how to use an action is in in the zip file.
Taking requests.
More here.
DOWNLOAD ACTION [RAR]
Written on at 17:36
by DefyingxMars
action 010.

The "tutorial" on how to use an action is in in the zip file.
Taking requests.
More here.
DOWNLOAD ACTION [RAR]
Written on at 17:32
by DefyingxMars
action 009.

The "tutorial" on how to use an action is in in the zip file.
Taking requests.
More here.
DOWNLOAD ACTION [RAR]
Written on at 17:24
by DefyingxMars
action 008.

The "tutorial" on how to use an action is in in the zip file.
Taking requests.
More here.
DOWNLOAD ACTION [RAR]
Written on at 17:22
by DefyingxMars
action 007.

The "tutorial" on how to use an action is in in the zip file.
Taking requests.
More here.
DOWNLOAD ACTION [RAR]
Written on at 17:18
by DefyingxMars
action 006.

The "tutorial" on how to use an action is in in the zip file.
Taking requests.
More here.
DOWNLOAD ACTION [RAR]
Written on at 17:15
by DefyingxMars
action 005.

The "tutorial" on how to use an action is in in the zip file.
Taking requests.
More here.
DOWNLOAD ACTION [RAR]
Written on at 17:12
by DefyingxMars
action 004

The "tutorial" on how to use an action is in in the zip file.
Taking requests.
More here.
DOWNLOAD ACTION [RAR]
Labels: action, actions, daenerys targaryen, game of thrones, photoshop, resources
Written on at 17:04
by DefyingxMars